Mongrel Field Manual · Anti-Xeno

AX Field Manual

From your first Scout contact to a disciplined Hydra fight. Identify the threat, understand the heart cycle, control your heat and movement, and learn what experienced AX pilots do differently.

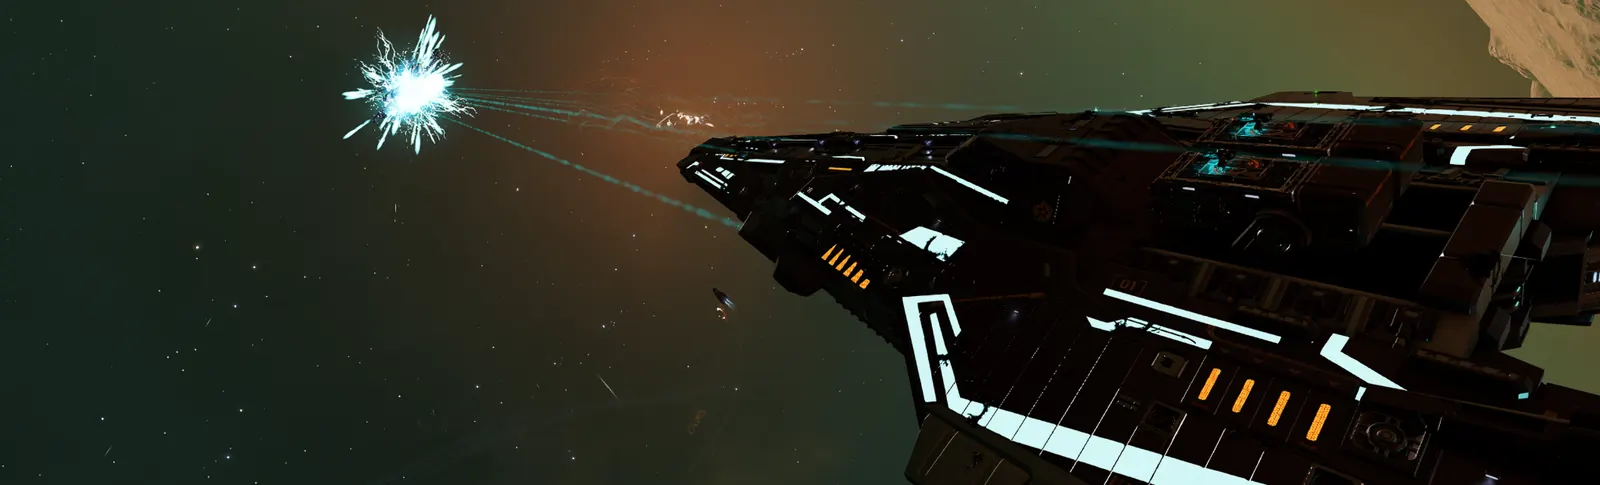
An Elite Dangerous anti-xeno engagement showing a Thargoid interceptor
Start Here
New AX Pilot

Stay alive long enough to understand the fight.

AX combat is not ordinary PvE with higher enemy health. Understanding phases and surviving the response to your own attacks is more important than raw damage. Your first successful sortie may simply be a controlled encounter followed by a safe retreat.

Veteran Principle

Control the next phase before finishing this one.

Every destroyed heart changes the engagement. Know where the swarm is, where your ship is moving, what your thermal signature is doing, and whether your team can survive the transition.

Before you drop into contact

  • Keep enough credits for a rebuy and know your exit system.
  • Check your anti-xeno weapons, ammo, cooling and survival equipment.
  • Set keybinds for heat sinks, shutdown neutralizer, boost, target subsystems and Flight Assist.
  • Carry synthesis materials if relying on ammunition or consumables.
  • Have a retreat condition: hull, canopy, damaged thrusters, lost cooling, or insufficient ammo.
  • If in a wing, agree on target calls and the disengagement procedure before the first shot.

Field rule: If you cannot explain what the Thargoid is about to do, create separation and re-establish control instead of forcing another shot.

Know Your Enemy · 01

Thargoid Scouts

Small targets, serious threats in numbers. Scouts have no standard interceptor heart cycle, so the job is prioritization, tracking and sustained damage—not heart exertion.

Scout variants — identify the support first

VariantFunctionCombat response
MarauderStandard attackerControl numbers, avoid head-on passes, finish exposed targets.
RegeneratorRepairs nearby ScoutsHigh priority in a mixed group; otherwise your progress can be reversed.
BerserkerEnhances nearby Scout aggression/damage and caustic missile behaviorHigh priority; watch for amplified incoming fire and missiles.
InciterImproves movement of nearby ScoutsRemove early when speed and tracking become unmanageable.

A Scout group with an active support variant is a different problem from the same number of ordinary Marauders. Prioritize the effect that is making the fight dangerous, not always the nearest red contact.

Beginner Scout procedure

  1. Check the contacts panel and identify support variants when possible.
  2. Keep moving laterally; do not sit motionless in front of several Scouts.
  3. Engage a selected Scout until it is destroyed rather than spreading damage without purpose.
  4. Break pursuit before contamination, overheating, or module damage becomes unmanageable.
  5. After the group is clear, assess resources before accepting another wave.

Skill transfer: Scout fighting develops target switching, aim, heat-sink discipline and battlefield scanning. But it does not teach the interceptor's heart, shield, shutdown, or swarm cycles.

Veteran notes Scout target selection in AX conflict zones

In a mixed fight, support Scout effects can multiply the danger of the entire group. Identify Regenerators, Berserkers and Inciters by type, behavior and visual effects rather than concentrating exclusively on Marauders. When allied ships are present, maintain awareness of what they are shooting and avoid pursuing a low-value Scout through a more dangerous threat.

Scout waves can also conceal the arrival or activity of an interceptor. Re-check contacts regularly. After clearing a group, use the lull for cooling, module inspection and resource checks.

Know Your Enemy · 02

Interceptor Identification

Four standard combat classes share the heart cycle but punish mistakes at increasingly demanding levels. The Basilisk is the speed outlier; the Hydra is the endurance challenge.

ClassHeartsTop speedThargons / swarmKey difficulty
Cyclops4450 m/s32Learn the full phase cycle.
Basilisk5530 m/s64Outrunning it is unreliable; master reversals.
Medusa6450 m/s96Damage, swarm pressure, precision and endurance.
Hydra8450 m/s128Long fight, very tough hearts and partially obscured angles.
4 → 8Heart countMore hearts mean more phase cycles.
530 m/sBasilisk speedSpeed-based escape is not a complete plan.
32 → 128Swarm scaleUnmanaged swarms become much more dangerous.

Specifications are established reference values; enemy position, line of sight, active swarms and special-attack state matter more than a simple difficulty label. The Orthrus is a specialized, nonstandard interceptor with no ordinary hearts. Hunters such as the Glaive and Scythe have their own mechanics.

Beyond the four standards Orthrus, Glaive, Scythe and non-hostile encounters

Orthrus: A specialist interceptor associated with Spire activity. It does not follow the conventional heart-exertion fight. Its historical encounters should not be confused with a normal combat interceptor.

Glaive: A very fast Hunter with disruptive abilities, including effects that threaten unprotected Guardian modules. Staying cold alone is not a universal defense against this kind of threat.

Scythe: A specialist Hunter encountered in particular cargo and passenger interception situations. Treat its capture/disruption mechanics separately from ordinary heart combat.

First contact: Some interceptors encountered outside active battles initially scan rather than attack. Carrying certain Thargoid or Guardian cargo or encountering Scouts can change their behavior. Do not equate the first scan with a guaranteed hostile encounter.

The Central Mechanic

Interceptor Heart Cycle

A standard interceptor regenerates its hull until its hearts are destroyed. Treat combat as repeating phases, not as a single DPS race.

01Establish control

Identify the class, manage swarm and range, make a safe firing angle.

02Exert a heart

Deal enough AX hull damage for a heart to glow and become vulnerable.

03Break the heart

Land precise shots on the glowing heart before its window expires.

04Survive the response

Expect shield and possible lightning, caustic or shutdown behavior.

05Recover and repeat

Cool, repair, manage swarm/shield and rebuild the firing position.

20%

Heart exertion

Exertion requires damage equivalent to roughly 20% of the interceptor's remaining hull. Do not confuse this with 20% of its original maximum hull.

~45s

Heart vulnerability

The exposed heart glows for roughly 45 seconds. Damage to a heart remains if you fail to finish it and later re-exert the same heart.

FINAL

Finish the hull

Once all hearts are broken, the interceptor no longer has its normal heart-driven regeneration. Destroy its remaining hull to finish.

Post-heart discipline: A heart break can trigger a shield and new combat behavior. Before taking the last shot, check heat, flight vector, swarm position and your ability to deal with the next phase.
Deep dive Shields, regeneration, wasted ammunition and panic shields

Why body damage fails: Intact hearts replenish interceptor hull rapidly. The correct job is to exert, target the exposed heart and eliminate its regeneration source. The small heart hitbox makes precise subsystem targeting important; a completed Xeno Scanner scan enables heart subtargeting.

Why shields matter: Following a heart break, the interceptor generates a shield that can naturally decay. If resources and the situation permit, use shield time to cool, reposition, synthesize or repair rather than automatically exhausting limited AX ammunition. A Thermal Vent beam can maintain cooling and contribute shield damage.

Unexpected shields: An interceptor can deploy a panic shield when receiving overwhelming damage or under certain rapid shield-break/countermeasure conditions. In wing fights this can look like a skipped or duplicated phase. Stop wasteful fire and identify the real state before continuing.

Timing matters: When a heart is exerted, the timer is running. But blindly rushing closer can expose you to lightning or ruin your orbit. A clean later shot is more useful than several dangerous misses.

Recognize the Warning

Special Attacks & Counters

Audio cues, visual effects and the current heart phase tell you what may happen next. The response should be practiced before the emergency.

Lightning Close-range control

After the first heart, an interceptor makes an aggressive lightning chase. A connection at roughly 700–800 m can immobilize or slow your ship, heavily damage shields and disrupt modules.

Do: Create separation before the heart breaks; keep lateral motion. If caught, anticipate swarm/cannon follow-up.

Caustic missiles Hull damage over time

They become a post-heart danger after the second heart and apply persistent corrosive damage if they hit. Heat, distance and attention influence whether the interceptor fires them.

Do: Evade the missile; remove contamination with a caustic sink or decontamination limpets. Heat burn-off is an emergency alternative with module-damage risk.

Shutdown field EMP / systems offline

A shutdown wave becomes a danger late in the heart cycle. The ordinary Shutdown Field Neutralizer consumes SYS energy and can protect ships in approximately a 3 km radius while held.

Do: Recognize the warning, prepare SYS power and hold the neutralizer through the passing wave. A brief early tap is not enough.

Anti-Guardian field Specialist enemies

Glaives and some other specialized environments can damage vulnerable Guardian technology. This is not the same attack as the standard shutdown pulse.

Do: Identify the threat and plan around module resistance or alternative equipment, rather than relying on the ordinary shutdown neutralizer.

Deep dive Advanced attack prevention and caustic removal

Cold post-heart behavior: An interceptor that cannot detect an appropriate warm target may enter a low-activity or "sleep" interval after a heart break. Experienced pilots use careful low-heat positioning to bypass some caustic and shutdown actions. This depends on the current target, other commanders and attacks already queued; treat it as a conditional tactic, not immunity.

Shutdown timing: Put power in SYS before activation. A neutralizer must be active at the moment the pulse crosses the ship. If the capacitor empties beforehand, it will not protect you. Keep the device's area of effect in mind if protecting a wing.

Caustic heat cleansing: Community tests describe contamination removal with sustained heat above roughly 180% or brief temperatures near 250%. Both approaches can damage modules. Proper caustic-removal equipment is preferable for learning and prolonged operations.

Silent Running: Suppressing the external signature is different from simply firing a heatsink. It stores heat internally and has tradeoffs, including loss of normal shield protection. It is one tool in the heat-control toolkit—not a universal answer.

Equipment Literacy — No Build Prescriptions

AX Weapons & Tools

Different tools address different problems. The important skill is knowing why you would bring one—not copying a ship loadout without understanding it.

Weapon / ToolMain purposeImportant limitation
Enhanced AX MulticannonsAccessible Scout damage and targeted interceptor heartsHeart work improves with proper scan/subtarget; high-end interceptors are tougher.
AX MissilesAX hull pressure and exertion in suitable approachesNot an efficient way to destroy exposed hearts.
Guardian GaussPrecision heart damage and exertionHigh heat and distributor draw; requires timing and aim.
Guardian ShardsClose-range burst damageSpread, heat, engagement distance and specialized tactics matter.
Guardian Plasma ChargersCharged AX damage and specialist tacticsProjectile travel and charge timing complicate precision.
Remote Release FlakDestroy Thargon swarmsDetonation timing and formation recognition.
Thermal Vent BeamCooling and shield-phase utilityRequires hits and sufficient WEP capacity.
Enhanced Xeno ScannerEnemy data, status and heart subtargetingRequires completing a scan under appropriate conditions.
Heat SinksReduce heat signature; cover hot firing cyclesLimited charges; heat rises again after depletion.
Caustic Sink / Decon LimpetCounter caustic contaminationCharges or limpets, plus timing and positioning.
Shutdown NeutralizerCounter standard interceptor shutdown wavesRequires SYS charge and correct hold timing.

This is a purpose-and-tradeoff table, not a current unlock or hardpoint-limit guide. Acquisition, experimental engineering and module limitations should be checked in the live game or detailed reference before equipping.

Veteran notes Precision, convergence, heat rhythm and resource economy

Actual application beats paper damage. A heart has a small hitbox. Hardpoint placement, projectile velocity, firing angle, target rotation and weapon timing determine whether the advertised damage reaches it.

Alternating Gauss groups can distribute heat and WEP demand through a repeatable firing rhythm. A missed volley costs ammunition, time and cooling capacity; do not fire merely because the weapon is ready.

Guardian limitations: Anti-Guardian effects can disable or damage vulnerable Guardian modules. Do not assume a favorite weapon will function in every encounter.

Resource accounting: Compare remaining heart count with available ammo, heat sinks, flak and repair capacity. If the remaining supplies cannot finish the fight, recover or withdraw before a resource shortage becomes a control failure.

Advanced Flight

Cold Orbiting & Range Control

A strong orbit combines low effective heat with sufficient sideways motion relative to the interceptor. Neither high speed nor low heat alone is a guarantee.

Cold orbit geometry An interceptor in the center; a circular path around it; a player ship with a tangential velocity arrow and a separate nose-to-target direction. A dashed radial line shows the high-risk straight approach. INTERCEPTOR SHIP SIDEWAYS VELOCITY NOSE / AIM Straight approach = poor angular motion ILLUSTRATION · NOT TO SCALE
Cold orbit: Flight vector travels around the target while the nose maintains an attack angle. The illustration shows geometry, not an exact flight-control sequence.

Heat below ~20%

This is a standard cold-orbit reference threshold for reducing the interceptor main cannon's ability to track you. A heatsink, Thermal Vent beam or other heat-control tactic may help maintain it.

Perpendicular velocity

Move across the interceptor's firing line rather than directly at it or away from it. High displayed speed is not proof of high angular movement.

Independent nose and vector

FA-off makes it practical to face the heart while the ship follows a lateral arc. Learn to correct drifting range without constantly overboosting.

Veteran notes Orbit entry, breakouts, Basilisk reversals and post-heart sleep

Orbit entry and recovery

A common precision-weapon orbit operates in roughly the 900 m–1.5 km envelope, but useful range depends on the ship, weapon and target. Enter with an intentional lateral vector, bring the nose onto the interceptor and use small thrust corrections. If the range is collapsing, solve the vector before taking another shot.

When the orbit breaks, do not confuse more boost with better control. A large radial component may make a fast ship easy to track. Create a safe separation or crossing maneuver, cool down and start a new orbit.

Basilisk reversal

A Basilisk can outrun many ships. Straight-line escape is therefore unreliable. Instead, induce a pass or change of direction and exploit the interceptor's momentum while you reverse or redirect your own vector. The maneuver buys room for a fresh orbit; it is not an excuse to fly close to lightning range.

Post-heart detection discipline

Experienced pilots may maintain a sufficiently low detectable signature during the short post-heart interval to prevent a special attack from acquiring a suitable target. With multiple commanders, a warm wingmate can defeat the strategy. Communicate who has attention, avoid accidental hot volleys and always be prepared to handle the attack anyway.

Silent Running versus heatsinks

Silent Running suppresses external heat signature but stores heat, and normally drops your shields. A heatsink actively removes heat and temporarily permits repeated hot weapon cycles. Neither replaces correct movement; use the technique appropriate to the encounter and ship state.
Second Enemy in the Fight

Thargon Swarms

The swarm has its own movement and attack patterns. Ignoring it can turn an otherwise clean heart fight into a series of damaging missile passes.

SEE

Track its position

Before exerting or breaking a heart, know whether the swarm is behind you, crossing your path or being handled by a wingmate.

CONTROL

Use flak deliberately

Lead the swarm's path and release Remote Flak near the actual Thargons. A ring of drones can have an empty center; detonating at the visual center may miss.

ADAPT

Choose your doctrine

Conventional flak management is the recommended training foundation. Flakless kiting and orbiting are advanced choices with higher movement demands.

Veteran notes Banked swarms, agitation, missile baiting and flakless technique

Replacement swarms: An interceptor can release another swarm after a heart break. If an existing swarm remains active, a replacement can be banked. Destroying the first swarm early simplifies later heart cycles, especially for learners.

Agitation: Passing through a swarm can change its agitation state and may trigger kamikaze missiles. In wing combat, call this immediately; another pilot could be positioned to receive the attack.

Flak timing: Practice at a controlled distance with predictable approaches before attempting difficult formations. A clean detonation often matters more than rapid repeated launches.

Flakless fighting: Some pilots keep the swarm displaced from the ship through movement, distance and orbit timing. Learn the standard swarm behavior first. A flakless approach does not mean the swarm is harmless; it exchanges a weapon slot for a persistent positioning burden.

Environment exception: Ordinary interceptor swarm deployment does not occur in the same way during suitable planetary encounters. Gravity and terrain create their own hazards and should be assessed separately.

Two Ways to Fight Well

Solo & Wing Doctrine

Solo work rewards repeatable control. Wing work rewards coordination, threat awareness and disciplined phase transitions. Both require the same core mechanics.

Solo procedure

  1. Approach and identify the enemy; recognize non-hostile contact behavior if relevant.
  2. Position and resolve initial swarm pressure if using conventional flak doctrine.
  3. Enter a controlled low-heat firing orbit.
  4. Exert and destroy one heart with deliberate shots.
  5. Protect against the next special phase; preserve enough room to reset.
  6. Use shield downtime to recover heat, modules, position and supplies.
  7. Repeat until the final heart and remaining hull are gone—or disengage on your planned condition.

Solo learning objective: Make the loop repeatable. A fast lucky kill teaches less than a slow, deliberate one that you can reproduce.

Wing procedure

  1. Assign a target caller and decide who is managing the swarm.
  2. Coordinate readiness before exerting the next heart.
  3. Call "exerted" and focus precise heart damage only when shots are clear.
  4. Call "heart down" and immediately shift to response/repositioning.
  5. Communicate shutdown, caustic, swarm agitation and repair needs.
  6. Do not drag aggro or the interceptor through a pilot attempting to recover.
  7. Maintain a surviving instance anchor if pilots need to rejoin, when safe and practical.

Wing learning objective: Fewer unplanned phase changes, fewer wasted supplies and fewer pilots caught by someone else's attention swap.

Useful short callouts:ExertedHeart downResetSwarm activeSwarm agitatedShutdown chargingCausticRepairingDisengaging
Veteran notes Aggro, wing positioning, cold resets and unusual shields

Aggro is not simply damage ranking: Heat signature, line of sight, current target behavior and combat context affect attention. A wingmate who draws the interceptor away from a clean heart angle may reduce the team's effective damage even while helping on paper.

Cold resets need everyone: A warm pilot firing or approaching at the wrong moment can provoke caustic or shutdown actions despite another pilot's perfect cooling. Agree on post-heart behavior and identify who currently has attention.

Wing spacing: Avoid forcing the entire team to chase a target far from the fight center, especially when different ships have very different acceleration. Keep the swarm away from pilots performing repairs.

Unexpected shields or bugs: Overwhelming damage can produce panic shields. If a heart appears invulnerable or a phase becomes inconsistent, cease wasteful fire, communicate and reassess rather than assuming more damage will fix it.

Support roles: A commander focusing on swarm management or repairs is contributing to the kill. However, every pilot should understand how to survive independently if the wing disperses.

Keep Open During a Fight

Emergency Quick Reference

First actions, not a guarantee. Prioritize keeping thrusters, cooling and escape options functional.

What you seeFirst responseAvoid
Heart exerted, no shotRebuild angle; keep the target within controllable range.Blind firing at the body or overshooting into lightning range.
Lightning chaseSeparate and move laterally before the close-range connection.Hovering at short range after a heart break.
Caustic missile launchedEvade its approach; prepare caustic removal if struck.Waiting for hull to collapse before acting.
Caustic contaminationUse sink or decon limpet; deliberate heat removal only if needed.Overheating without considering module damage.
Energy surge / shutdownAllocate SYS and hold neutralizer through the wave.One short tap followed by an empty SYS capacitor.
Swarm launches missilesChange vector and create room; resume swarm management.Continuing a stationary heart shot through the swarm.
Ship running too hotStop unnecessary volleys, cool and reset the attack.Firing the next hot weapon cycle reflexively.
Thrusters / canopy compromisedProtect control, review repair and life-support time, prepare escape.Beginning another heart cycle without a viable recovery path.
Ammo or sinks nearly goneCompare remaining resources with remaining hearts; synthesize safely or exit.Continuing until every resource is exhausted.
Wingmate calls disengagingMake a clear safe route, keep threats away and maintain communication.Dragging the interceptor across the escape vector.

Learning Route

Training Without Skipping the Fundamentals

These are practice milestones, not rigid rank gates. Team competence and controlled disengagement count as real skills.

  1. First contactIdentify threats, use heat controls and retreat intact.
  2. Scout proficiencyPrioritize support Scouts and survive a mixed group.
  3. Wing CyclopsRecognize exertion, heart breaks, shields, swarms and special attacks.
  4. Controlled solo CyclopsRepeat the cycle with your own heat and range discipline.
  5. Basilisk / MedusaAdapt to speed, tougher hearts, greater swarm and sustained pressure.
  6. Hydra / coordinated wingMaintain precision, resource economy and communication over a long engagement.

A capable swarm specialist, support pilot or wing lead is no less valuable than a commander collecting solo Hydra kills. Skill is how consistently you help the fight succeed.

Historical & Specialist Context

Spires, Titans & the Second Thargoid War

Know what these sites were without confusing historical operations with combat activities currently available.

Thargoid Spire Sites

Huge atmospheric-world Thargoid industrial structures once used in the war and associated with Orthrus activity, ground threats and coordinated human sabotage. Known facilities are no longer operating as they did during the war. This is a recognition and history overview, not an active combat walkthrough.

Thargoid Titans

Enormous command vessels surrounded by dangerous Maelstrom environments. Historical assaults involved caustic clouds, powerful pulses and coordinated attacks on vulnerable thermal systems. The final Titan, Cocijo, fell in December 2024; the war's Titan assault phase concluded.

If active Titan or Spire combat returns, this section should be expanded using then-current mechanics, targets and required tools. Do not use an old assault playbook as a live mission guide.

Further Reading

References & Corrections

Practical guidance is based on established community research. Exact encounter availability, game changes and specialist equipment rules should be confirmed before use.

Editorial review draft — October 2026. General-purpose AX training; intentionally does not prescribe specific ship builds. Major revisions should be checked against live-game testing.